
The useParams hook is essential in developing a friendly user interface with React. Hence, an important knowledge React developers must be familiar with. The useParams hook enables the development of complex React interface with multiple parameters such as e-commerce and blogging websites.
This tutorial focus on providing the practical steps and knowledge on how to apply the useParams hook in React applications. This tutorial will cover the following topics:
1. What is the useParams hook?
2. Requirements to apply the useParams hook
3. Benefits of using the useParams hook
4. Practical steps on how to apply the useParams hook.
Prerequisite:
This is a beginner-friendly tutorial for those interested in learning React and how to apply the useParams hook of React-router. Although to get the best from this tutorial, it is important to be familiar with some basic React and JavaScript tools. These tools include:
React Routing,
Map function, and
Destructuring.
You must also be familiar with HTML and CSS. Thus, I recommend learning the above concepts first before moving ahead with this tutorial.
What is the useParams hook?
The useParams hook is a React router hook that is used to create and access multiple parameters of a website. In essence, the useParams hook gives access to multiple contents in the same URL path. The useParams hook enables each parameter to have a unique identification. Through this unique identification, each parameter can be accessed and rendered in the same URL path.
E-commerce and Blog apps are examples of applications with multiple parameters. Other examples where the useParams hook is also applicable include Learning Management System (LMS)–i.e. online tutorial sites, search buttons of websites, articles/newspapers websites, and amongst others.
A blog app, for instance, contains several blogs. Each blog will have a unique id, through which each blog can be accessed.
Requirements to apply the useParams hook
To apply the useParams hook in your React app, some basic tools and libraries are required. In this section, we shall be looking at these basic requirements.
1. React-router-dom
The react-router-dom is an external React library that provides routings in React applications. The react-router-dom comes with the useParams hook. Thus, to apply the useParams hook, react-router-dom must be installed in your React app. This section below provides the guide to set up React app and installing react-router-dom.
2. Component
A Component is a series of JavaScript codes that returns HTML elements. Components in React determine the contents to be displayed on your browser.
To apply the useParams hook, create a component and import the useParams into the component. Next, assign a variable to useParams method using object destructuring. See the code example below.
import { useParams } from 'react-router-dom';

function Blog(){
  let { blogid } = useParams();

  return<p>my unique id is {blogid}</p>
}
3. Route tag
The Route tag signifies the URL path in your browser. The Route tag accepts two attributes. They include the path attribute and the element attribute. The path attribute is assigned to a URL path. The element attribute is assigned to the component to be rendered.
To apply the useParams hook, the path attribute will also contain a placeholder. What the placeholder does is it returns dynamic content based on the value that matches it. See the example below.
<Routes>
    <Route path='/blog/:blogid' element={<Blog />}></Route>
</Routes>
Take note of the following:
blogidis the placeholder and can be any name of your choice.The placeholder usually contains
':'before its value.The placeholder name must match the value assigned to the useParams method in the component.
Thus, a URL path–
/blog/2will return the blog contents with the id number–2.
Benefits of using the useParams hook
The useParams hook comes with a lot of benefits both to React developers and users. Below are some of the benefits of using the useParams hook.
Multiple Parameters: The useParams hook is used to create multiple parameters containing dynamic contents. Thus, using the useParams hook in your applications provides users with a large pool of information in a friendly manner.
Increase app performance: The useParams hook renders dynamic content without leaving the current URL. This increases the app's performance and reduces loading time.
Easy Accessibility: The useParams hook is a user-friendly tool that makes it easy to access multiple parameters and contents.
Fewer codes: The useParams hook enables developers to create multiple parameters with few lines of code. In essence, this eliminates unnecessary repetitions and reduces the amount of codes to be written.
Practical Steps on how to apply the useParams hook in React.
In this section, we shall be building a simple e-commerce interface that display multiple products. Each product will have a unique id through which we can access them.
This section will be divided into three parts.
The first part will guide us through how to create a React app.
The second part will guide us through how to create a simple e-commerce interface.
The third part will guide us through how to apply the useParams hook in our project.
Let's begin.
Part One—Create React project
The below steps guide us in creating a React app and installing react-router-dom.
Step 1: Create React App
To create your react app, follow the below instructions.
Open your terminal and create a new folder for your React app.
Navigate to your newly created folder and create a new React app. Use any of the commands below to create your React app.
C:\Users\Username\Desktop>mkdir react-app
C:\Users\Username\Desktop>cd react-folder
C:\Users\Username\Desktop\react-folder>npx create-react-app my-app
OR
C:\Users\Username\Desktop\react-folder>npm init react-app my-app
OR
C:\Users\Username\Desktop\react-folder>yarn create react-app my-app
Take note of the following:
You must have node.js installed on your system before you can create a React app. If you don't have node.js on your system, visit https://node.js.org to install it.
react-appandmy-appis the name of your folder and react app respectively. They can be any name of your choice.
Step 2: Install React-router-dom
The below instructions guide us to install React-router-dom in our React project.
Navigate to your app directory in your terminal.
Install react-router-dom using npm or yarn.
See the code example below.
C:\Users\Username\Desktop\react-folder>cd my-app
C:\Users\Username\Desktop\react-folder\my-app>npm install react-router-dom
Step 3: Start the server
While still in your app directory, start your React app server just as the codes below.
C:\Users\Username\Desktop\react-folder\my-app>npm start
Yarn users:
C:\Users\Username\Desktop\react-folder\my-app>yarn start
Note: use npm or yarn to install React dependencies and run React scripts depending on what you use to create your React app.
The start script runs your react app sever on localhost:3000.
Part Two—Set up a simple e-commerce interface
We've successfully created our React app and installed react-router-dom. Next, We can now create a simple e-commerce interface.
Step 1: Modify index.js file
Open your React app with any code editor of your choice and follow the below instructions to modify the index.js file.
Open your index.js file in the src directory.
Import BrowserRouter from react-router-dom using object destructuring.
Update root const by wrapping the App component between BrowserRouter tags.
The final codes of the index.js file should look like the code example below.
import React from 'react';
import ReactDOM from 'react-dom/client';
import './index.css';
import App from './App';
import { BrowserRouter } from 'react-router-dom';

const root = ReactDOM.createRoot(document.getElementById('root'));
root.render(
  <BrowserRouter>
    <App />
  </BrowserRouter>
);
Step 2: Create Products component
This component will hold the data of our products. But before we go ahead with creating a Products component, create an image folder first in the src directory. The image folder should contain all the necessary images to be used. Next, follow the below instructions to create the Products components.
Create a components folder in the src directory.
Create a Products.js file in the components folder.
Open your Products.js file and create a Products variable.
Assign Products variable to an array of objects. Each of these objects should contain a unique id, title, description, and image.
Export the Products component.
See the code example below.
const Products = [
    {
        id: 1,
        title: "Product Name",
        description: "This is the description of product with an id of 1. Provident nihil minus qui consequatur non omnis maiores. Eos accusantium minus dolores iure perferendis tempore et consequatur. ",
        image:  require('../images/product-1.png')
    },
    {
        id: 2,
        title: "Product Name",
        description: "This is the description of product with an id of 2. Provident nihil minus qui consequatur non omnis maiores. Eos accusantium minus dolores iure perferendis tempore et consequatur. ",
        image:  require('../images/product-2.png')
    },
    {
        id: 3,
        title: "Product Name",
        description: "This is the description of product with an id of 3. Provident nihil minus qui consequatur non omnis maiores. Eos accusantium minus dolores iure perferendis tempore et consequatur. ",
        image: require('../images/product-3.png')
    }
]

export default Products;
Step 3: Create a card component
The essence of the card component is to loop through our products and render them in an organized way. The following instructions guide us on how to create the card component.
Create a Card.js file in the components directory.
Open the Card.js file and import the Products component.
Create a Card function with a return statement.
Create a productItems variable before the return method in the card function.
Assign productItems variable to a map function that iterates through our Products. The map function should be like the code example below.
const productItems = Products.map(store =>{
        const {id, title, description, image} = store;

        return(
            <div key={ id } className="card">
                <img src={image} alt=""></img>
                <h3>{title}</h3>
                <p>{description}</p>
            </div>
        )
    })
Finally, Create a section tag in the return method of the Card function. In between the section tags, should be our productItems in curly braces. Don't also forget to export Card component.
Our final codes for the Card.js file will be like the code example below.
import Products from "./Products";

function Card(){

    const productItems = Products.map(store =>{
        const {id, title, description, image} = store;

        return(
            <div key={ id } className="card">
                <img src={image} alt=""></img>
                <h3>{title}</h3>
                <p>{description}</p>
            </div>
        )
    })

    return (
        <>
            <section className="card-section">
                {productItems}
            </section>
        </>
    );
};

export default Card;
Step 4: Style the card component
Add some CSS styles to our Card component in the index.css file.
Note: Our div tag and section tag in the Card component contains className attributes. These className attributes were created purposely for CSS styling.
Open the index.css file in the src directory and apply the below CSS styles.
.card-section{
  display: grid;
  grid-template-columns: repeat(3, 1fr);
  gap: 20px;
  margin: 40px;
}

.card{
  padding: 1.2rem;
  font-size: 1.2rem;
  border: 1px solid rgb(104, 101, 101);
}
Step 5: Create a home page
The home page will serve as the default page of our app and will render our card component. The below points guide us to creating our home page
Create a pages folder in the src directory.
Create a Home.js file in the pages folder.
Open the Home.js file and import the Card component.
Create a Home function with a return method. The return method should contain our Card element.
Export the Home.js file.
See the codes below.
import Card from "../components/Card"

const Home = () => {

    return (
        <>
            <h1>Home Page</h1>
            <Card />

        </>
    )
}

export default Home;
Step 6: Modify App.js File
The App.js file is the root component that determines what should be rendered on our browser. In this step, we shall modify our App.js file to render our pages. The below instructions guide us to modify our App.js component.
Open your App.js file and import the Home component.
Update the return method of the App.js file to contain the Home element as seen in the code below.
import React from 'react';
import './App.css';
import Home from './pages/Home';


function App() {
  return (
    <div className="App">
      <Home />

    </div>
  );
}

export default App;
Save all files and navigate to localhost:3000 on your browser. The outcome will be like the screenshot below.
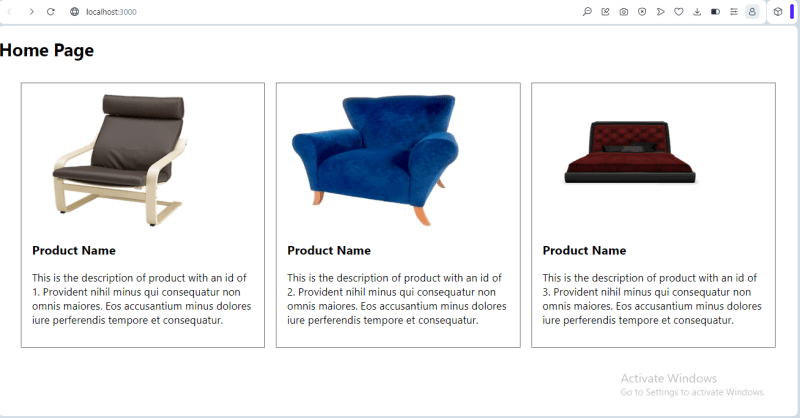
Great work in creating our e-commerce interface. But there's still a lot of work to be done. For instance, our product description should contain lesser words and there should be a link in each card that directs us to each product. Hence, we shall be applying the useParams hook.
Part Three—Apply the useParams hook
The useParams hook will enable us to create a user-friendly interface with permission to access each product through its unique ids. The useParams hook comes with the React-router-dom package. Thus we shall be importing the useParams hook from react-router-dom before we can apply them. Let's begin.
Step 1: Create a ProductDetail page
The ProductDetail page will contain and render the complete detail of each product based on its unique id. The below instructions guide us to create the ProductDetail page.
Create a ProductDetail.js file in the pages folder.
Open the ProductDetail.js file and import the following:
Products component from the component folder
useParams from react-router-dom using object destructuring.
Create a ProductDetail function with a return method.
Assign 'id' to the useParams method in ProductDetail function, but before the return method. For example:
let { id } = useParams().Create a product variable and assign it to the find method. Example:
const product = Products.find(product => String(product.id) === id);.
The find method here is used to match the id of each product so that other details of the product can be accessed.Create a section tag in the return method of the ProductDetails function. The section tag should contain a key attribute that is assigned to the id in curly braces.
Create the other tags that receives other product objects using dot notations.
Export the ProductDetail.js file.
The final codes for the ProductDetail.js file will be like the code example below.
import { useParams } from "react-router-dom";
import Products from "../components/Products";

function ProductDetail() {
    let { id } = useParams();
    const product = Products.find(product => String(product.id) === id);

    return (
        <>
            <section key={id} className="details-section">
                <img src={product.image} alt=""></img>
                <div>
                    <h3>{product.title}</h3>
                    <p>{product.description}</p>
                </div>
            </section>
       </>
    )
}

export default ProductDetail;
Step 2: Style productDetail page
Add CSS styles to beautify and organize our productDetail page in the index.css file. Note that we already gave our section tag on the productDetail page a className.
.details-section{
  display: grid;
  grid-template-columns: repeat(2, 1fr);
  gap: 30px;
  margin: 90px;
  font-size: 1.3rem;
}
Step 3: Create Routes
Routes direct us to the URL path to access our content. We shall be creating all necessary routes in the App.js file. The below instructions guide us to create our routes.
-
Open the App.js file and import the following:
- ProductDetail from pages folder,
- Routes and Route from react-router-dom.
-
Update the return method of the App.js function to the following:
- Create a Routes tag.
- Create two Route tags in between Routes tags. Please note the difference between Routes and Route to avoid mixing them.
- Each Route tag should contain a path and an element attribute.
See the code example below.
import React from 'react';
import './App.css';
import Home from './pages/Home';
import ProductDetails from './pages/ProductDetails';
import { Route, Routes } from 'react-router-dom';

function App() {

  return (
    <div className="App">

      <Routes>
        <Route path='/' element={<Home />}></Route>

        <Route path='/product/:id' element={<ProductDetails />}></Route>
      </Routes>
    </div>
  );
}

export default App;
Take note of the following:
Our first Route path is assigned to
'/', which signifies the default URL path. The default URL path displays our Home component.Our second Route path is assigned to
productwith a placeholder–:id.
Step 4: Modify the card.js component
The below instructions guide us to modify the card component.
Open the Card.js file and import Link from react-router-dom.
Insert
Linktag in betweenptag in the return method of card component. The Link tag should contain atoattribute.Reduce the description words using the Slice method.
The final card component codes should be like the code example below.
import { Link } from "react-router-dom";
import Products from "./Products";

const Card = () => {


    const arrayDataItems = Products.map(store =>{
        const {id, title, description, image} = store;
        return(
            <div key={ id } className="card">
                <img src={image} alt=""></img>
                <h3>{title}</h3>
                <p>{description.slice(0, 100)}<Link to={`/product/${id}`}>See more</Link></p>
            </div>
        )
    })

    return (
        <>
            <section className="card-section">
                {productItems}
            </section>
        </>
    );
};

export default Card;
Note that the value of our to attributes uses a backtick and template literals ( ${} ) with the value–id. This is the standard method of accessing the URL path of each parameter.
Save all your files and navigate to your browser. The gif image below shows the outcome of our project. Each product can now be accessed through its unique ids.
Conclusion
This document provides a comprehensive knowledge of the useParams hook. The useParams hook is essential in creating React applications that require multiple parameters. Thus, enabling easy access to each parameter in a user-friendly manner.
Thank you for reading and I hope you find this tutorial useful.
Additional Resources


Top comments (0)